How about that for a blog post title… eek.
First…… it’s too dark to take pics of our finished Advent Calendar, so I’ll pop those in here some other time. {Perfect Isn’t a Thing TM}
Update: pics have been added!
The internet, Instagram {same but diff, okay} and Target have been blasting my face off with pre-made advent calendars and advent calendar DIY ideas since October. It’s fine, I’m cool with thinking ahead. I already knew that last year’s trinket route wouldn’t be repeated. So when ‘action cards’, so-to-speak, began popping up, I knew I’d found my fit.
Going into the month of December and the holiday season, it’s easy to mentally tally up things you’d like to do, memories you’d like to make, crafts you’d like to create.
And it’s not a fun feeling {for me. You too?} to get knee-deep in December and realize you haven’t done those things you’d dreamed of. Sigh….
So, Lindsey {from Lo and Behold Studios} and I got to thinking… We wanted to create a way to make the memories and do all the things that you want to do, but to not feel overwhelmed about it.
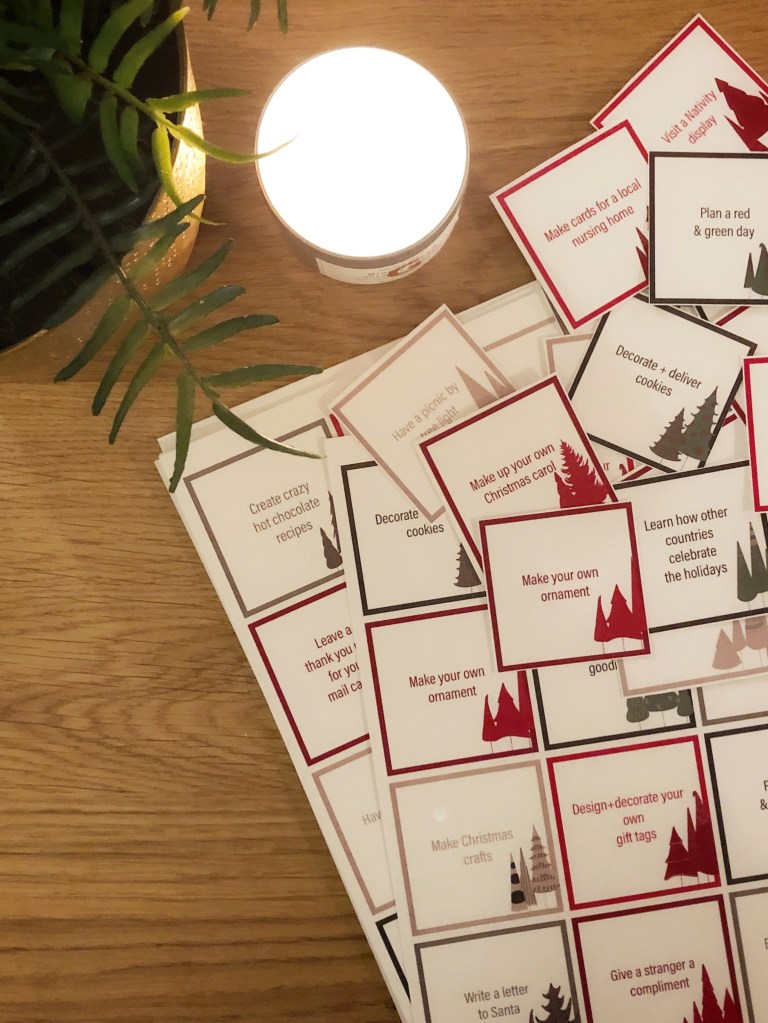
WE CREATED ADVENT CALENDAR CARDS! {available here}
Here’s how I’m using them AND how I went ahead and prepped our December so that our family time together would best serve our desires.
ONE.
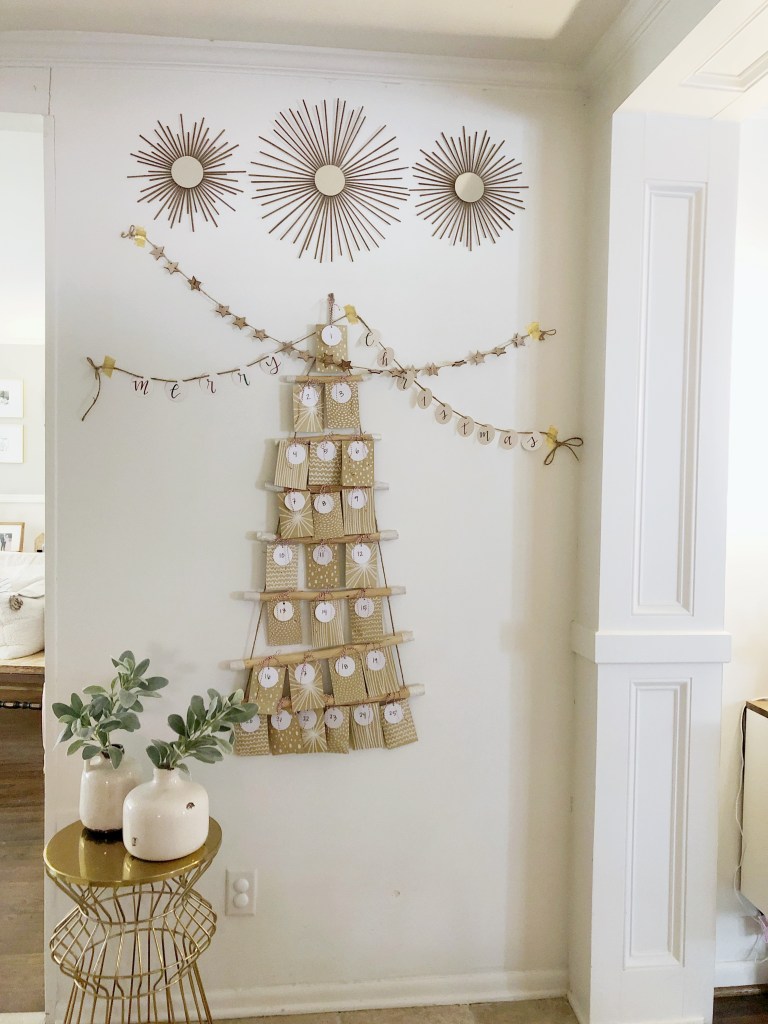
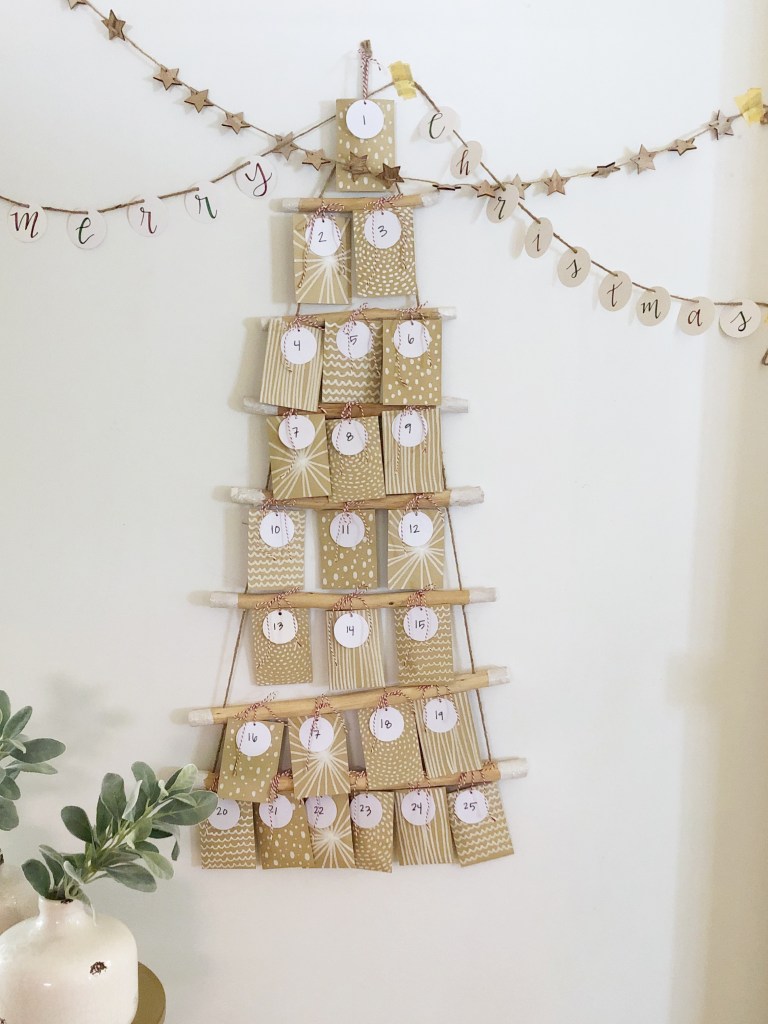
Find or make an advent calendar. There are so many adorable ones in stores right now. If you like to make your own things, here’s how I made ours –
The first year it will cost some money {$25ish or less}, but for the next few uses, it’ll be super inexpensive, or free! Woohoo! This is our second year doing this:
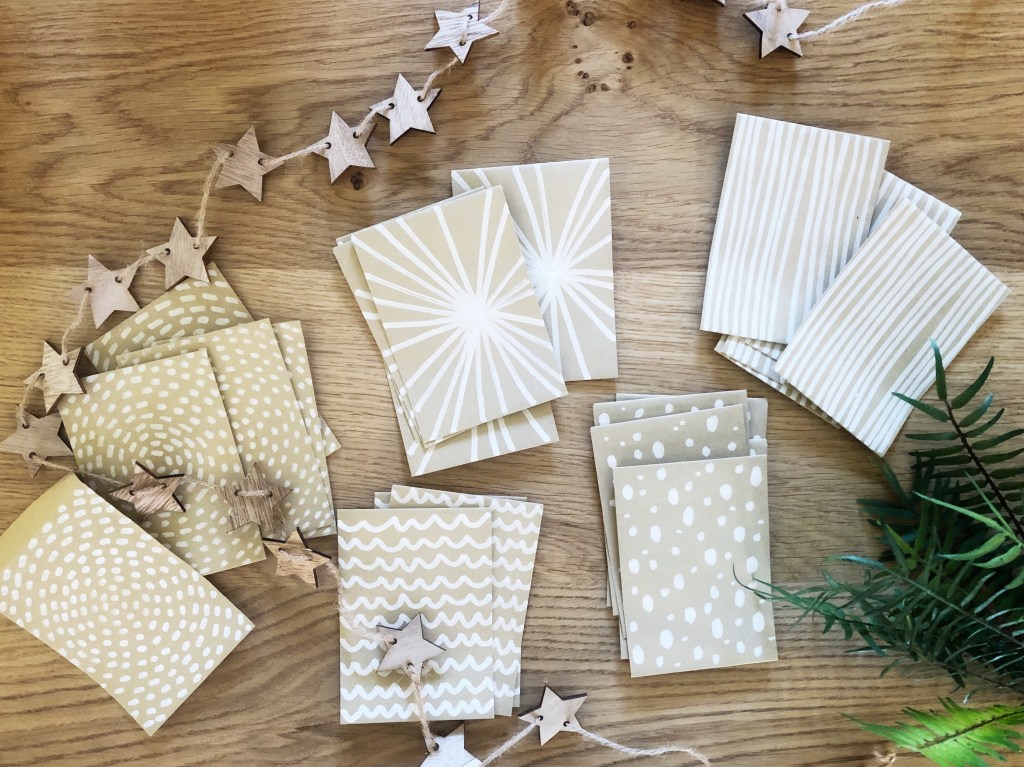
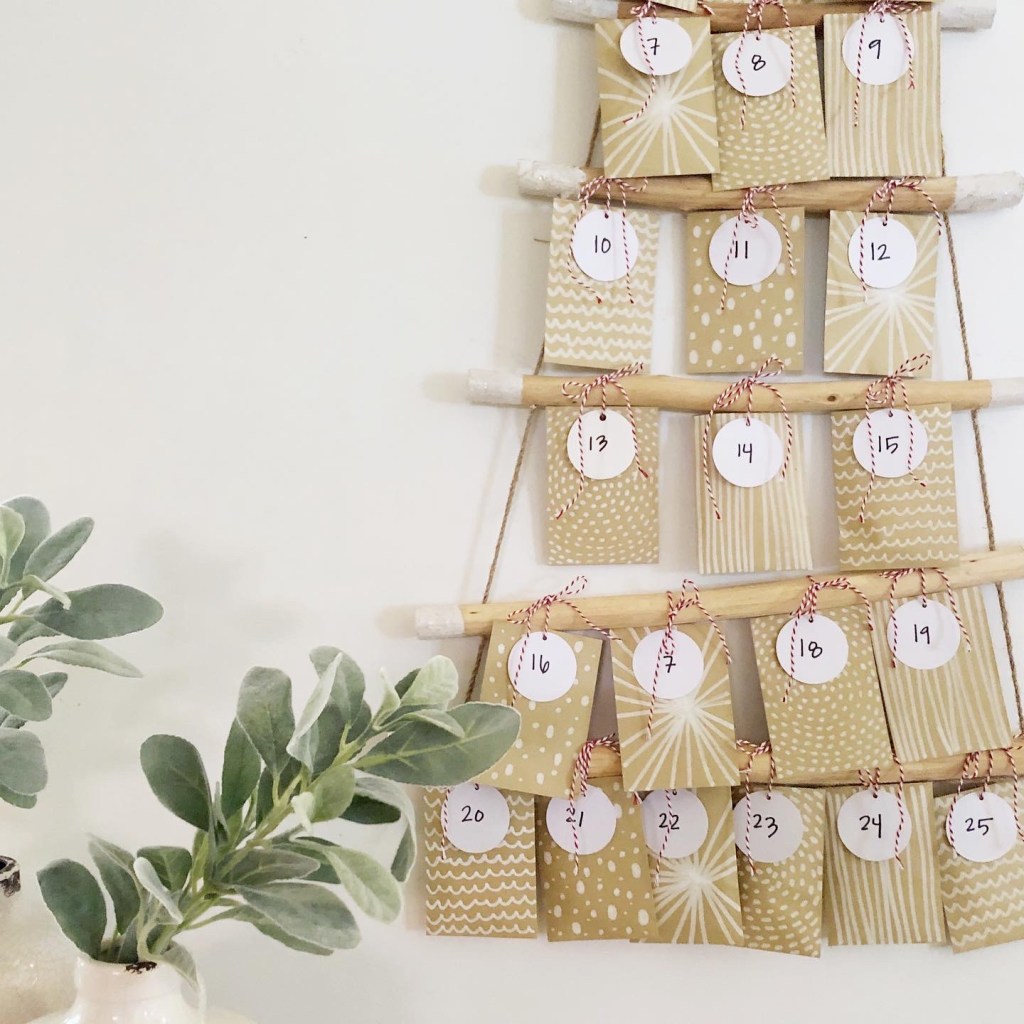
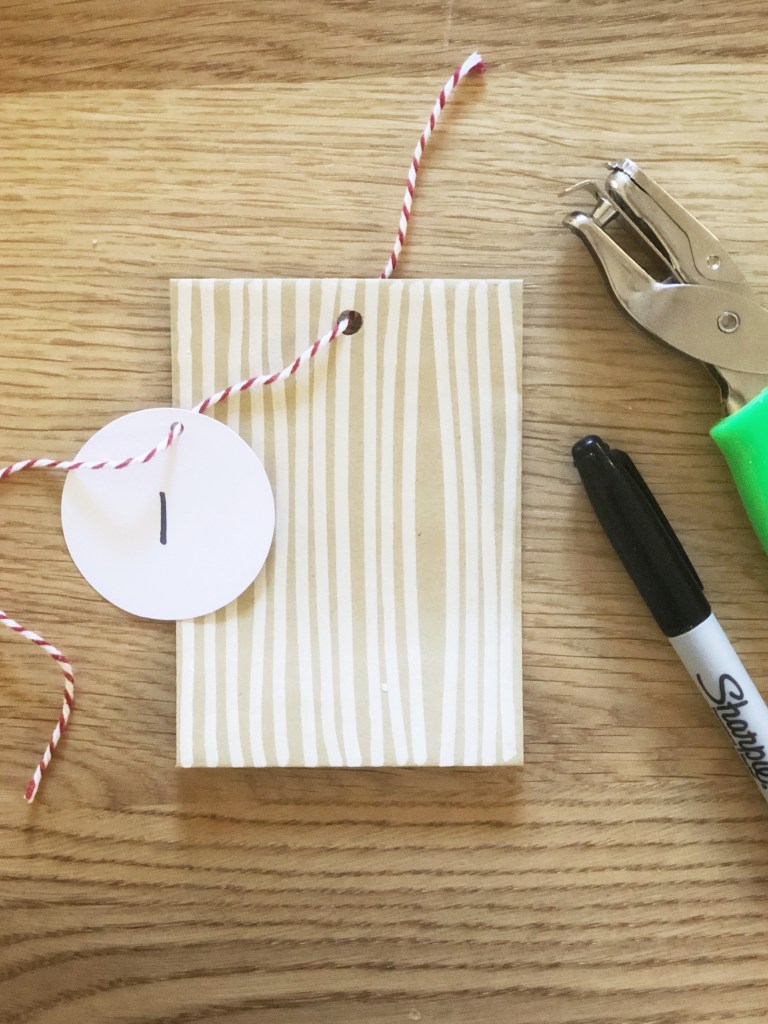
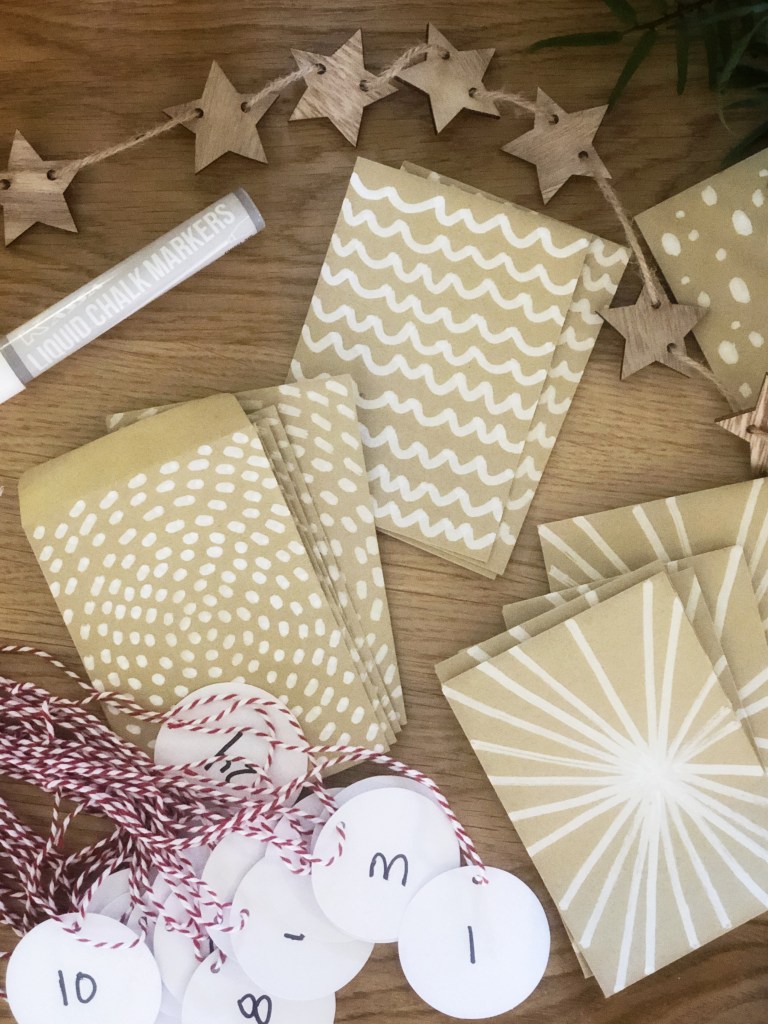
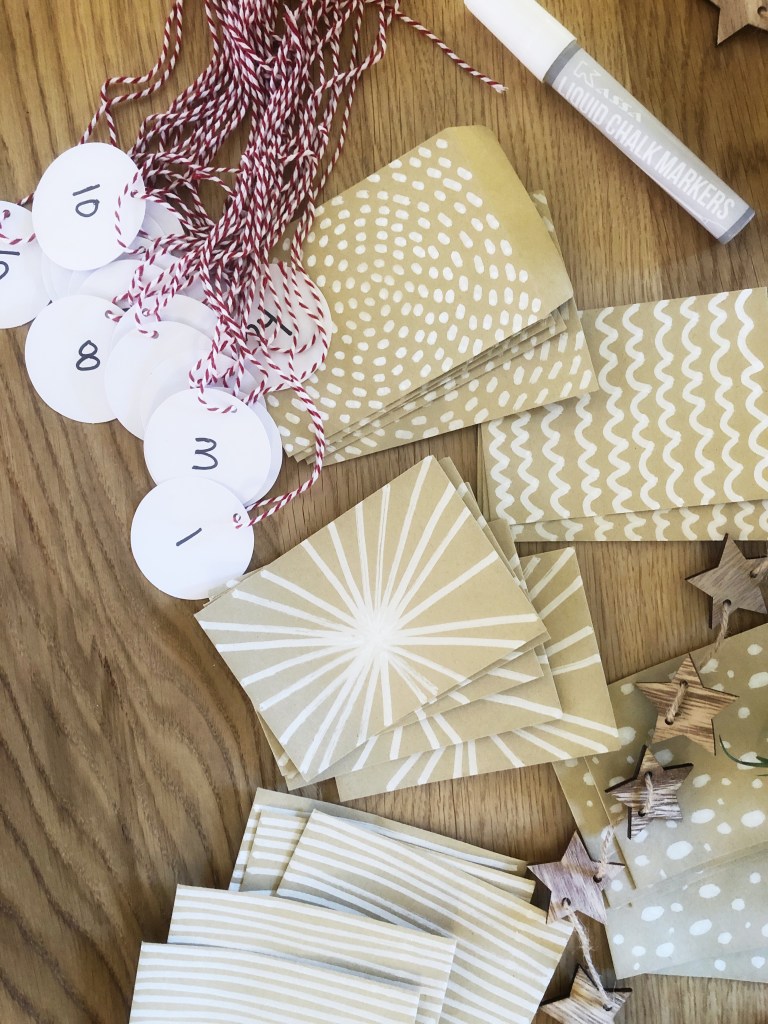
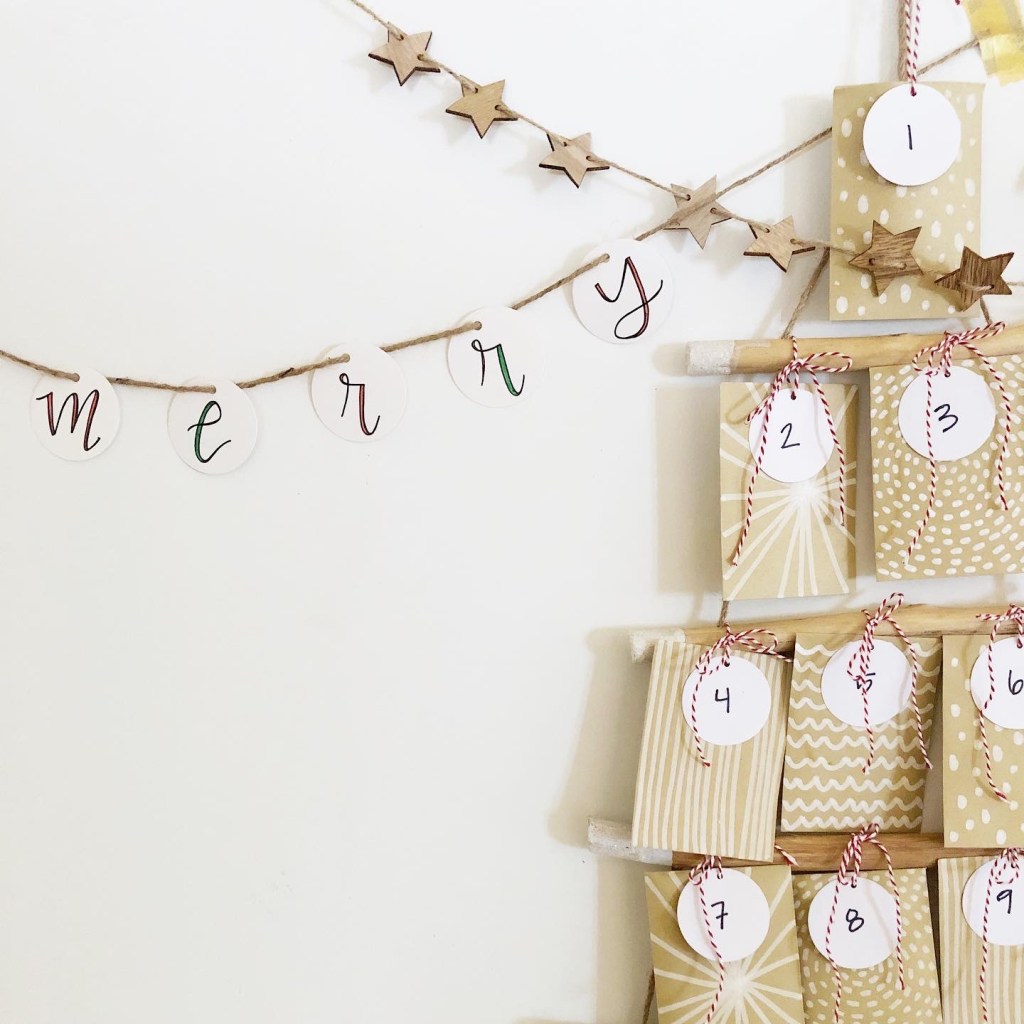
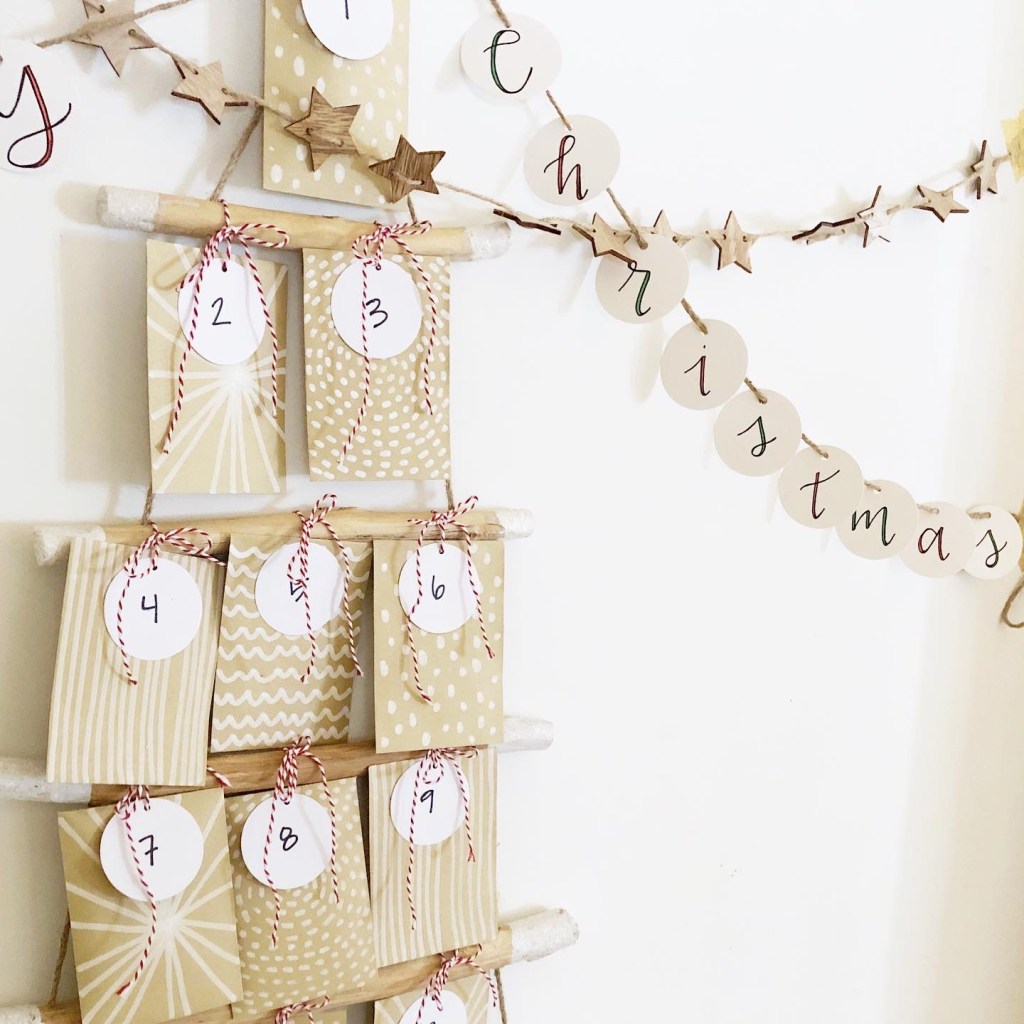
- Purchase, decorate, and punch holes into small envelopes. I use these and decorate with a white chalk paint pen.
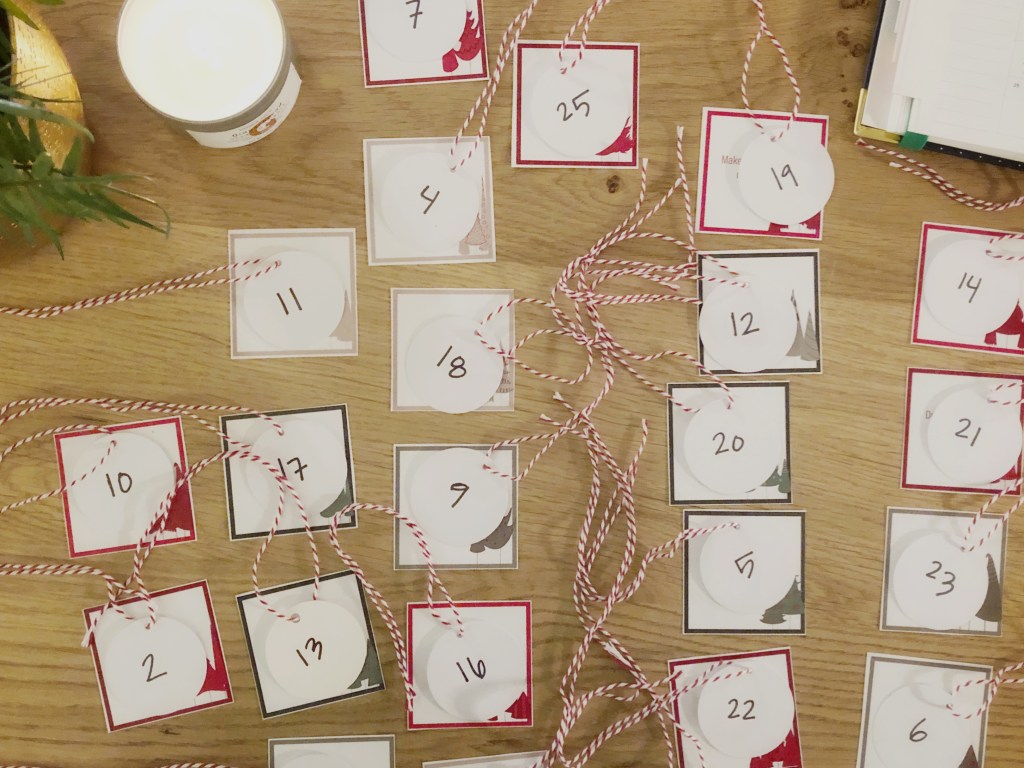
- Number your envelopes. You can write the number directly on the envelope or create little tags like I did using these round pre-cut tags. {note: these are used year round as gift tags for every. single. gift. we. give.}
- Stuff your envelope with our advent cards {digital download available here}. And maybe a candy cane, too 😉 But wait… read on to Step 2 before you actually stuff
- Hang your envelopes using string, twine or bakers twine… wherever! A strand of garland on your mantle, a string taped to your wall {wall-loving hack in my IG highlights here}, etc. We use one similar to this cute and very easy wall tree situation from Target.
TWO.
Schedule the season. Deep breath, that sounds way more intense than necessary. All we want to do here is find the best opportunities for the activities that we want to do. We can do this!
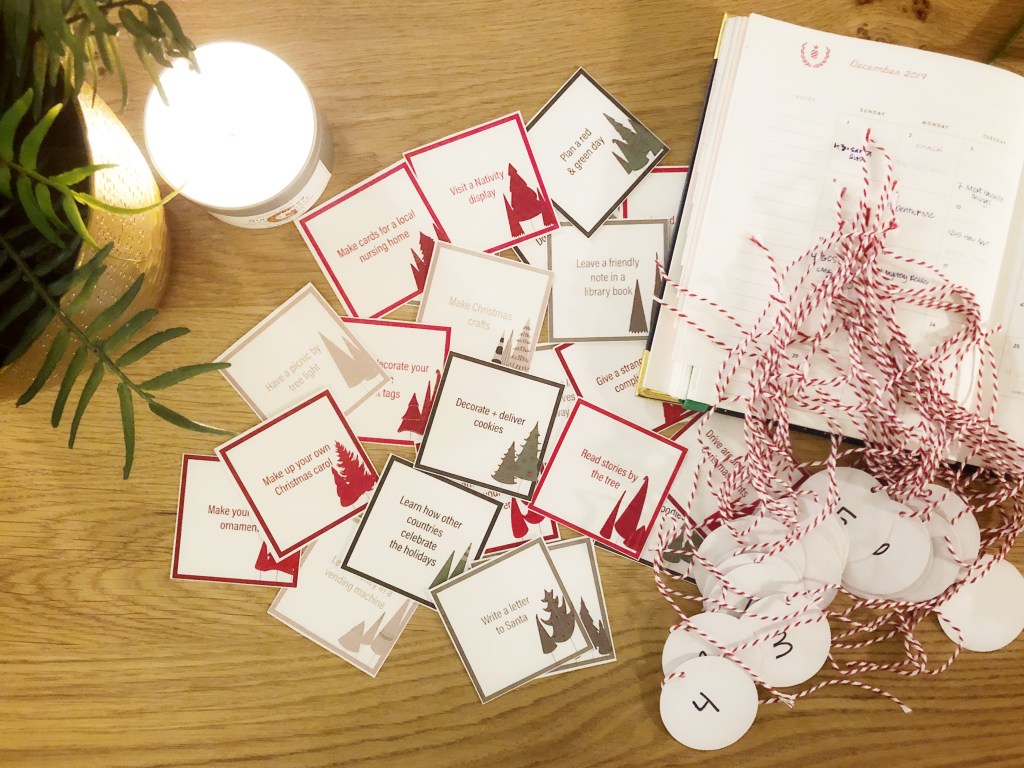
Categorize your advent cards into a few stacks. These worked for me: 1. School days and days with daytime or evening activities. 2. Weekdays with no daytime or evening plans. 3. Weekends.
Things like ‘write a thank you letter to your postal worker’ are activities that I can pull off in category 1.
Something like ‘donate a new toy to a charity’ I saved for category 2 so that we could shop and deliver the gift the same day, to close the mental loop for my daughter.
And, an example of a card in category 3 is ‘create crazy hot chocolate recipes.’ I put it there so that my husband can join in on the fun andddd so that we don’t sugar load before school, naptime, or bedtime.
P.S.: Does an activity not work for your family? Toss it. Is there something else that you want to make sure you accomplish or attend? Print off a sheet of just the backs and write your own advent cards!
THREE.
Now let it all roll. We’ve done our best to find the opportunities to make our little seasonal dreams come true.
We’ll pull some off, and some just won’t happen. That’s okay. So! What!
What I love about these cards is the mix of quick activities and longer projects. I also love how so so many of the activities are teaching opportunities and ways to show love to our communities.

Promise me this though… don’t overdo it. Sure, pick one or two that you
‘get pinteresty with’, but make the rest fun and super-super simple {crayons on printer paper, ladies}. Our kids are going to have fun and YOU SHOULD TOO.
Hoping off my soapbox now. I just care about your mental health, okay?!
Thank you for reading!
Amanda Macy Hall
P.S: Humongous thank you to Lindsey at Lo and Behold Studios for designing these cards!
P.P.S: They come in both 24-day and 12-day versions!
And it cost me under $2 to print them same-day at the UPS Store in full-color on cardstock. {upload the file directly to the UPS store online}